Many businesses have messy operations.
You might rely on a hodgepodge of disconnected systems and processes. A collection of paper or manual processes and a handful of software programs.
The problem? You deal with inefficiencies daily like double or even triple data entry.
While you current “system” might work just enough to keep things running, you’re probably thinking, “There has GOT to be a better way to do this.” Or, “Wouldn’t it be cool if…? I bet we can save a ton of time and make things even better if…”
That’s why many turn to custom software.
You have an idea of how software can help, but you’re not sure where to start. How realistic is your idea? Can it really be built? And, if so, what would it take? And how would we even go about doing it?
That’s why we’re here. Follow these steps to not only validate your software idea, but build a successful product or tool that transforms your business.

Step 1: Gather and Prioritize Input from Stakeholders
Custom software for a business should never be the brainchild of a single person. While you might have the original idea, it should serve as a starting point. Then, you can turn to other key stakeholders about how the software can help your business and what functionality to prioritize first.
Involving others early in the process to gather their input and ideas does two things.
First, it gives you access to their ideas. They may have different perspectives than you, especially if they’re “in the weeds” of the business daily. With their help, you can get new insights into your business that you wouldn’t have known otherwise.
Second, it helps get buy-in from the whole team. People take ownership of projects when they feel that their ideas and perspectives are valued. And without buy-in, your team won’t fully adopt the software. They won’t believe in it like you do.
Need help gathering your team’s input? Use SPARK’s Custom Software Planning Survey. This set of questions can help you gather the right information you need.
Step 2: Define Your Idea
With input from your team, you can start to clarify and define your big idea.
At first, you might just have hunch about “a software program that could make this work better.” But how precisely should it work? What functions does it need? What would it actually look like?
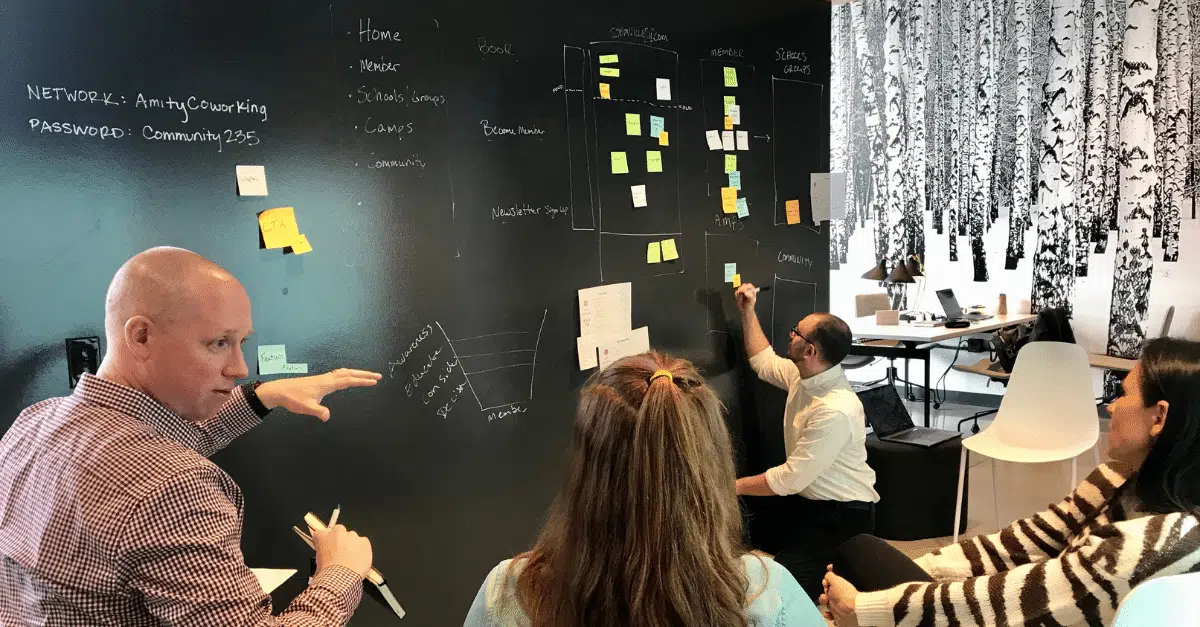
An easy way to start bringing your idea to life is to put pen to paper. Make some drawings of potential software screens or workflows. Simple (even crude) drawings can make somewhat vague ideas more concrete.
Here’s one of many sketches that eventually became WMU’s Goal Scaling Solutions software, a SPARK client. (See it doesn’t have to be pretty.)

You can also take it a step further by creating your own hand-drawn wireframes. You can sketch out ideas using pre-formatted paper that mimics device screens, which you can download here.
Often done by UX designers, wireframing is used as a schematic or blueprint of how the software should work.

But this stage of the process isn’t about the “design” per se. Instead, it’s about defining the functionality of the software. Because what you want to have happen on-screen (the front end) determines what needs to happen behind the scenes (the back end).
Another way to start is by creating process flow diagrams. This is just a simple visualization of the business and information flow that the software should facilitate.
Either way, these early drawings can can help you, your programmers, and designers think about and communicate the structure of the software you want to build. It’s an ideal way to test, evaluate, and validate your ideas.
 SPARK Tip: Sketches and wireframes are types of early software prototyping. Learn more about how prototypes work and why they’re important to elicit feedback and understand what features to build and how.
Step 3: Calculate and Estimate ROI
Developing software takes time, money, and energy. After all, you’re building something new from scratch to work exactly as your business does.
(Keep in mind that custom software isn’t always as expensive as you think either. You can build a solution within your needs and budget.)
And like any other investment, it should only be made if the potential return is worth it.
Fortunately, there are 3 different areas you can consider when measuring your ROI:

- Direct savings (easy to measure): This includes things like hours saved per year from tasks such as data entry.
- Indirect savings or revenue opportunities (difficult to measure): This could include things like new business your team is free to develop because they have their time saved from mundane and repetitive tasks.
- Benefits (no immediate financial benefit): This might include things like simply having a nicer and more pleasant place to work or the benefit of knowing you work for a company that invests in up-to-date technology.
You can get more details about how you can calculate your ROI here.
Every business will have its own ROI. So it’s important to consider your unique situation and the impact your new custom software can have.
Need some help calculating an ROI? Download SPARK’s free ROI Estimating Tool.
Step 4: Determine the Project’s Feasibility
Next, you need to determine whether the tool you want can be built.
For example, your idea might depend upon system A being able to talk to system B. Well, CAN system A talk to system B? Is it even possible? This is the time to find out.
At SPARK, we recommend starting a software project with an assessment. Led by a software development partner, an assessment is a thorough project discovery that tests the feasibility of your software idea.
While you may have some ideas on paper, it takes a whole different level of thinking and effort to turn those same ideas into real software. So, it’s a good idea to test out and dive deeper into the technical details of your project.
Think of an assessment like a trial run. It helps you avoid the situation of a sales person telling you “Yeah, sure, we can build it. No problem. We got real smart folks on our team.” But then months and hundreds of dollars later, that isn’t the case at all and the team in fact can not build it.
At SPARK, our assessment process considers your 1) business goals 2) timeline and budget and 3) technical feasibility of building the software tool. Throughout the processes we can hash out any challenges and enable you to make smart decisions about what to build exactly and how.
 Plus, an assessment gives you insight into what it’s like working with your development partner. Of course, you want to work with someone who deeply understands the “why” of your project and has your best interests in mind. And you can find that out for yourself before fully committing to the project with that partner.
Learn more about how to choose the right development partner.
Step 5: Build an MVP
When you’re ready with your product roadmap, you can move into the development stage!
For most projects, it makes sense to develop your new tool in a phased approach. That way it minimizes the disruption to your operations, keeps your budget under control, and allows you to be flexible with changes along the way.
With that in mind, we recommend you start small. And the best way to do that is to build a minimum viable product (MVP). An MVP is the smallest version of a solution that solves the business problem at hand.
It doesn’t have to be pretty or perfect. It won’t include every single feature you envision. But it does include functionality that solves a problem for the user and, thus, provides value. It’s a matter of finding small wins that will make the biggest impact.
The best part of building an MVP is that it focuses on iteration, testing, and user feedback. The faster you can get a working product into your team’s hands, you can gather feedback and continue to build the RIGHT features. If you need to change direction or tweak a feature at some point, no problem.
In other words, you’ll avoid spending a lot of time and money developing a piece of software that isn’t really wanted.
If you haven’t heard of an MVP, that’s okay! A software development partner like SPARK can help walk you through the process.
Read more about why you should start any software project with an MVP.
Step 5: Plan for Implementation
You’re near the finish line! Your software is almost “done.”
But don’t get too caught up in celebrating just yet. How do you plan on rolling out the new software to your organization?
This is one of the most overlooked parts of investing in new software. And, unfortunately, can ruin your project. Do not throw caution to the wind for software rollouts.
As you near the end of the development process, you should define a detailed game plan for how to roll out the new shiny software to your team. By committing to this plan, you can ensure your team will adopt whatever tool you just spent weeks or months building. A win-win for everyone.
SPARK Tip: Once you’re ready, follow SPARK’s implementation checklist to prepare for a smooth transition after going live. We developed it after helping hundreds of others launch their own solutions.
Step 6: Don’t Forget about Support and Maintenance
After your custom tool is built and successfully implemented, there’s still more work to be done.
Really? Yes. Software is not set it once and forget about it.
Like any important investment such as a house, custom software requires upkeep over time to keep it running smoothly. But some organizations adopt a “wait until it breaks” mentality before thinking more about their software. And it’s a risky approach.
Read more about how regular support and maintenance helps you build on your initial investment.
Instead, you can proactively plan for support and maintenance. If you don’t have your own team in-house to help, you can retain your development partner through a support licensing agreement (usually a monthly payment). They can regularly monitor your software and catch any small problems before they turn into serious (costly) ones.
And, once you have your custom software solution in place, think of it as a new foundation or starting point you can build on. You can work with your partner to make your software even better over time as your company and industry evolve.
Building Software That Will Serve You for Years to Come
When done right, your once vague software idea can turn into an asset that serves your business for years to come. It just takes some thoughtfulness and preparation along the way. By following these steps, you’re becoming a smarter business leader that’s embracing technology the right way.
If you’d like to talk to some business-savvy software experts about your idea, please reach out to SPARK. We’d love to hear from you!
In the meantime, download our free guide below about custom software to further learn what it takes to build successful digital tools.


